How to recover data from an external hard drive
Being convenient, compact and relatively accessible, external hard drives are widely used for data storing all over the world. They seem to be absolutely reliable, but mind that they are just electronic devices and sometimes fail the same way as any other data storage medium. Even so, that doesn't mean that once lost from a portable hard drive, the files are lost forever. In most cases, they could be completely or at least partially restored with a data recovery software like Recovery Explorer Standard.
You can use this program to recover data that has been deleted by mistake or lost because of accidental disk formatting, virus attack or any other kind of logical failure on an external HDD, SSD or SSHD. The software has two modes: the Standard (or full-featured) and the Wizard (simplified) one. It's up to you which one to choose. Or you may try both.
- Recover data from an external hard drive under the Standard mode
- Recover data from an external hard drive under the Wizard mode
First, download Recovery Explorer Standard from this website and install it on your PC. Please, pay attention to the version of the program as there are 3 of them for different operating systems: Windows, Linux and macOS. Pick the one that corresponds to your OS. The installation is absolutely easy and won’t take long, but if you need step-by-step instructions, please find them here.
We also recommend that you check a couple of rules to follow when trying to restore data from an external HDD, SSD or SSHD.
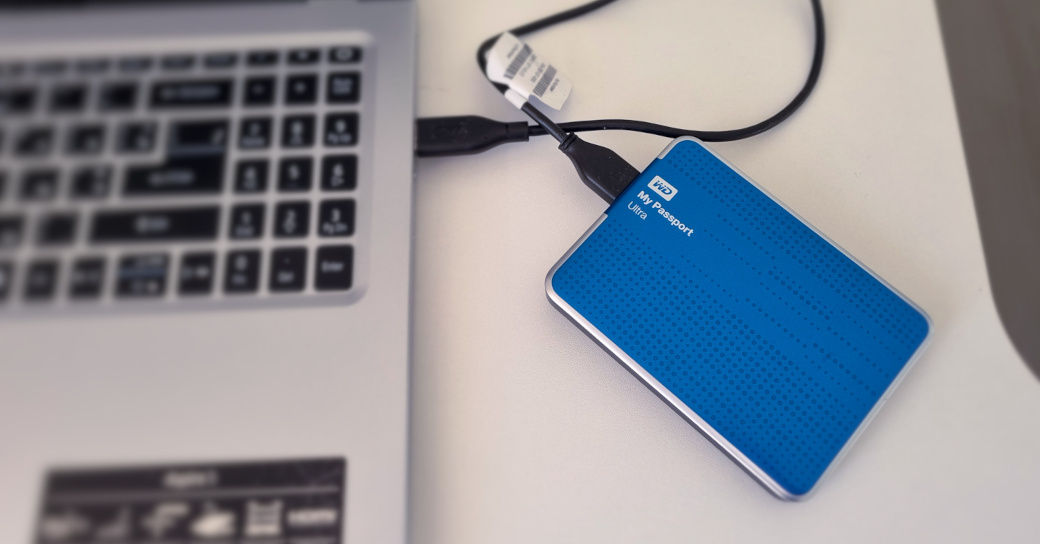
Once you’ve learned all the precautions, connect your portable hard drive to the PC and launch the program.
As for the drive’s connection, you can use its native USB cable (check if it’s working properly before using) or just plug it into a USB port in case it has an integrated male-type USB connector (typical of some SSDs).
Recover data from an external hard drive under the Standard mode
-
Find your SSD, HDD or SSHD among the listed data storages.
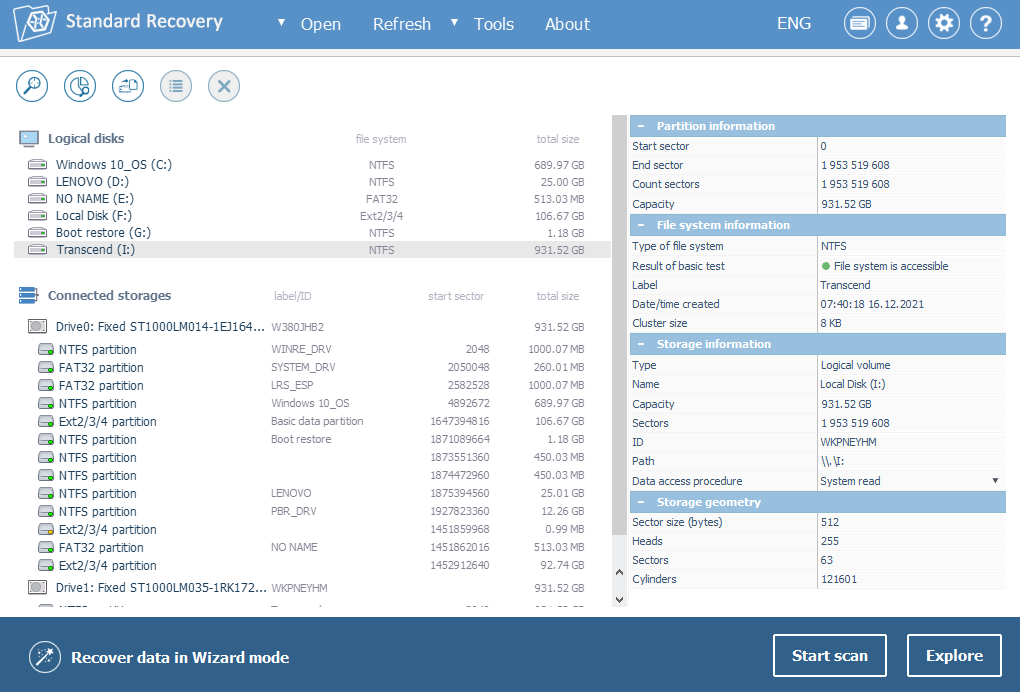
If it's not there, please follow the steps of this article.
-
Select it and press Start scan at the bottom of the program screen. Alternatively, you can start the scanning procedure by clicking on the magnifying glass icon at the top bar menu.
-
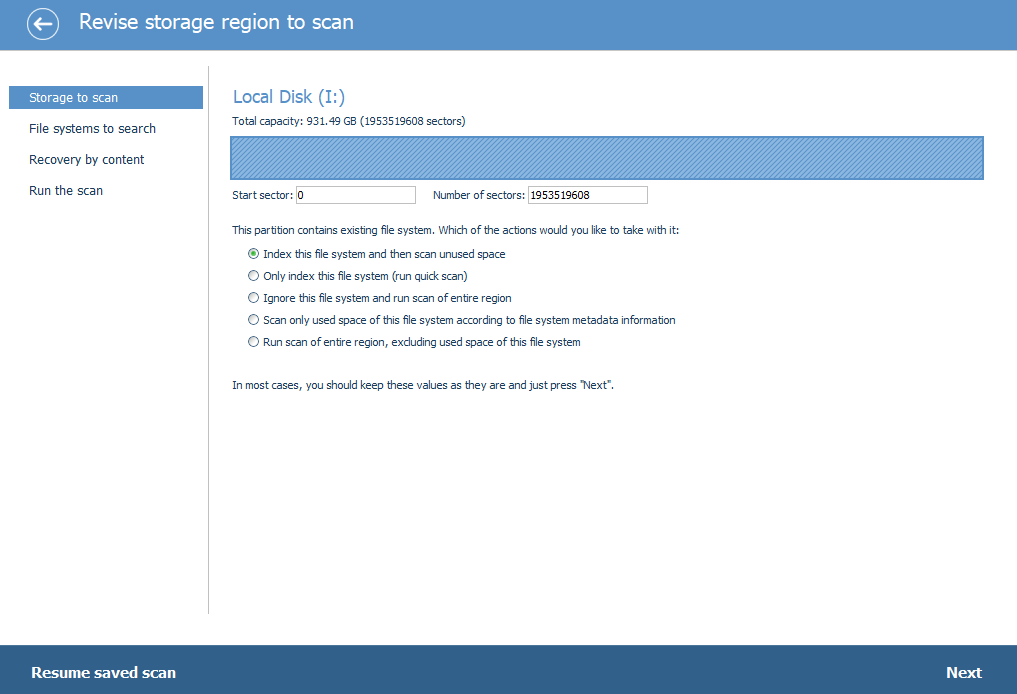
Now you need to configure the scanning. You may leave the default settings as they are or select any option you need. Then click Next at the bottom.
-
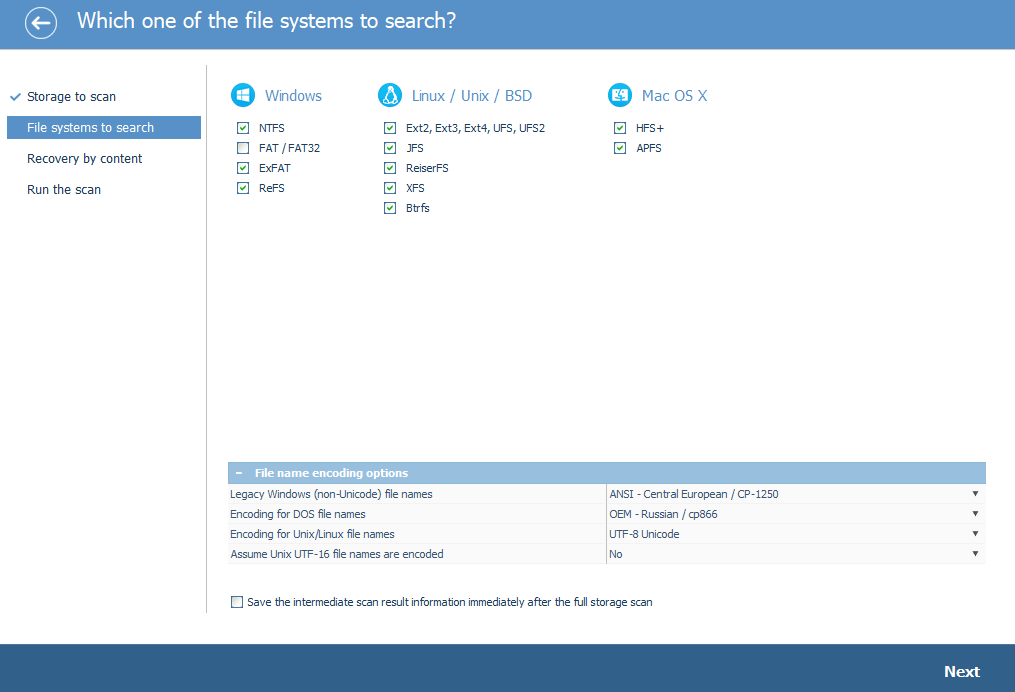
Now choose among the supported file systems: you can check off all or uncheck those you don’t need. Click Next.
-
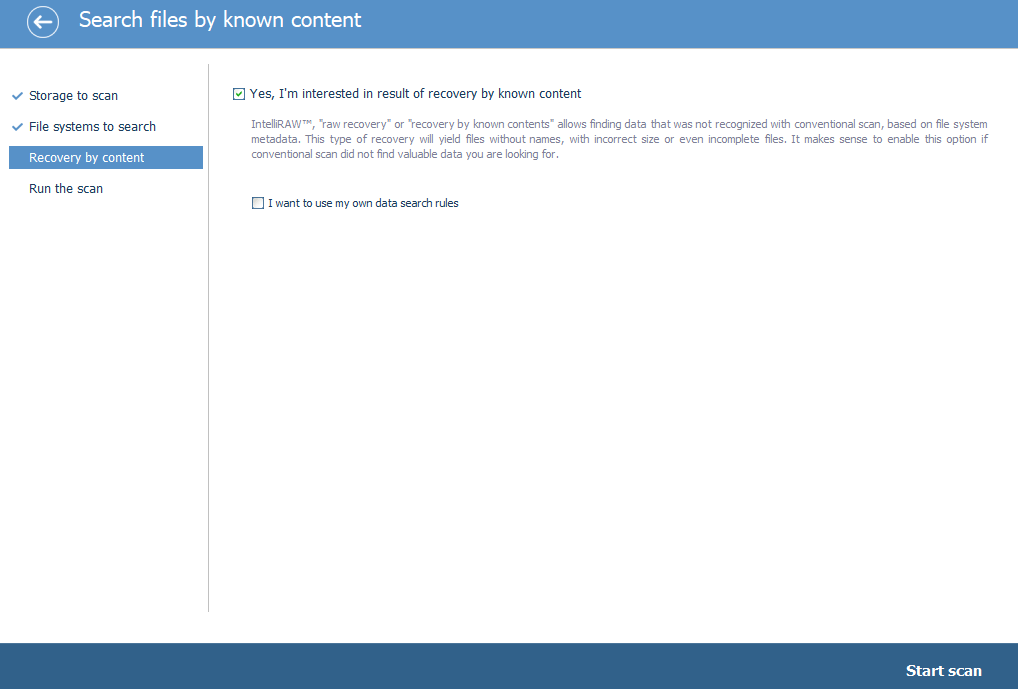
Set the last parameter by ticking off the checkbox next to Yes, I’m interested in result of recovery by known content. Here you can find more information about Raw data recovery and its rules.
-
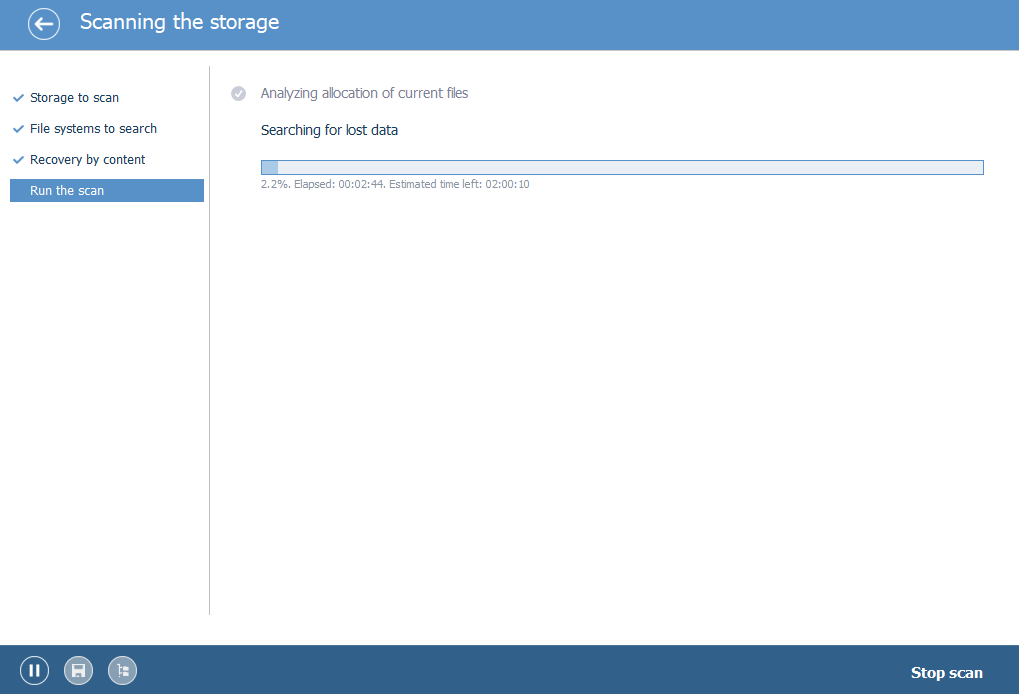
Click on the Start scan option and wait till the program scans your external hard drive. The progress bar shows the time left till the end of the scanning.
-
Once it’s finished, you’ll see a popup suggesting that you save the scan result database. You can save it or click No and skip. In case you choose the first variant, please don’t save the database to the external drive you’ve just scanned.
-
Look through the recovered data. Mark all the files you need to copy.
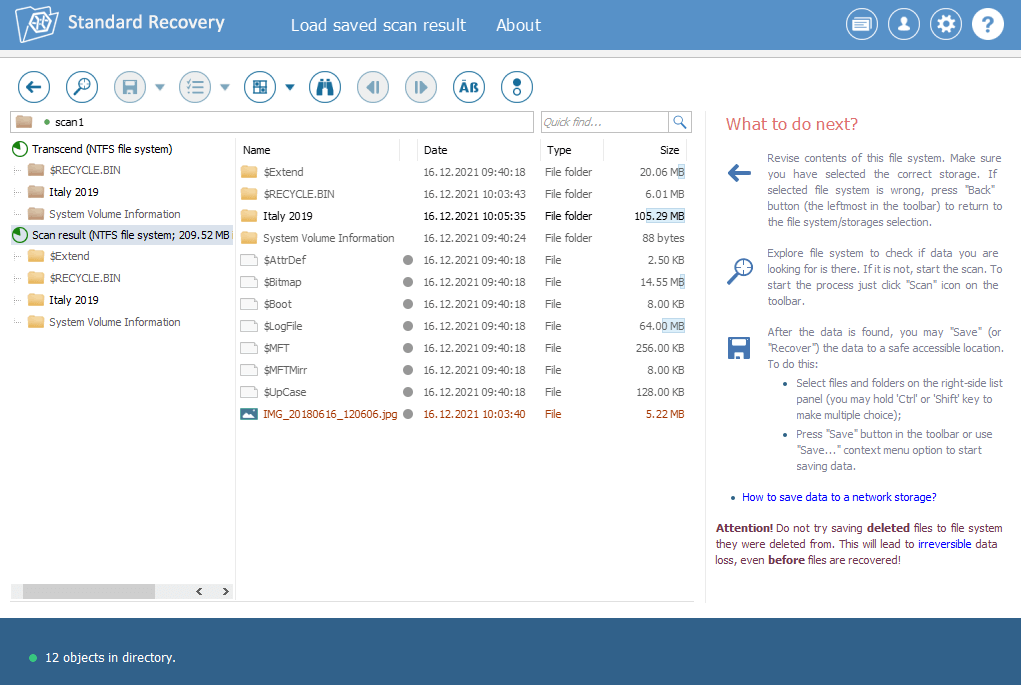
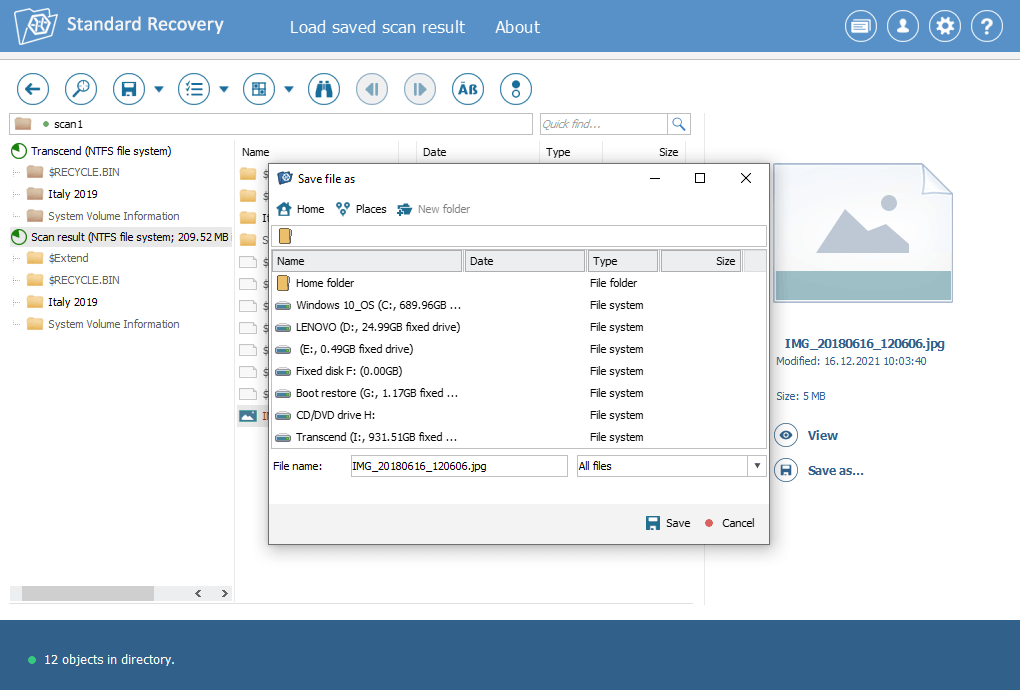
For more details on how to preview, select, find and save files, please refer to this article.
With the free trial version of the program you can save an unlimited number of files, each one being not bigger than 256 KB in case of Recovery Explorer Standard or 768 KB in case of Recovery Explorer RAID or Recovery Explorer Professional. If you need to save large files, order a license. Please see this guide on how to choose and purchase a license.
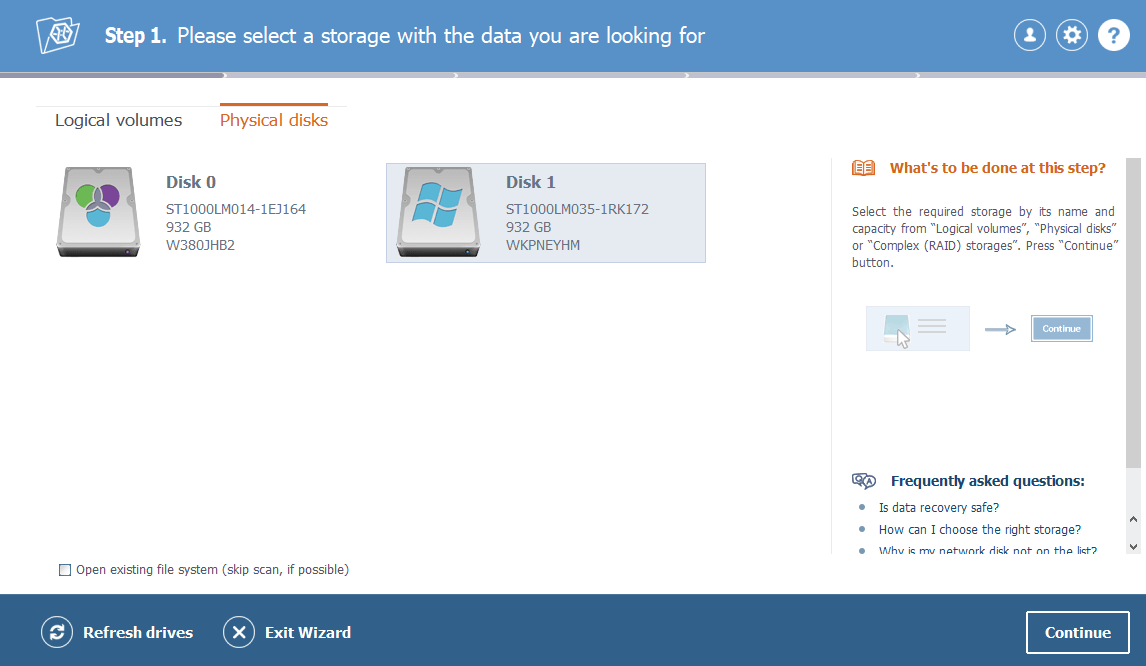
Recover data from an external hard drive under the Wizard mode
-
Switch to the Wizard mode by clicking on the corresponding option at the bottom.
-
Click on the Physical disks tab and find your HDD, SSD or SSHD in the list. Select it.
-
Click Continue and wait till the program completes the scanning of the drive.
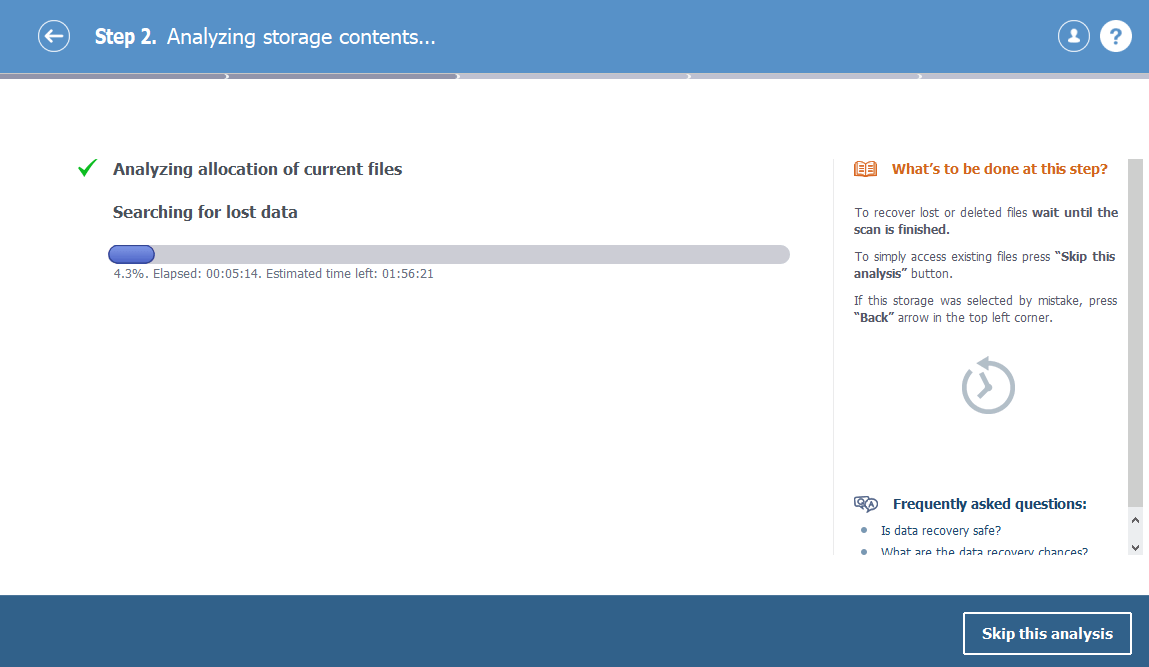
When it’s finished, find all restored files under the Deleted files tab.
-
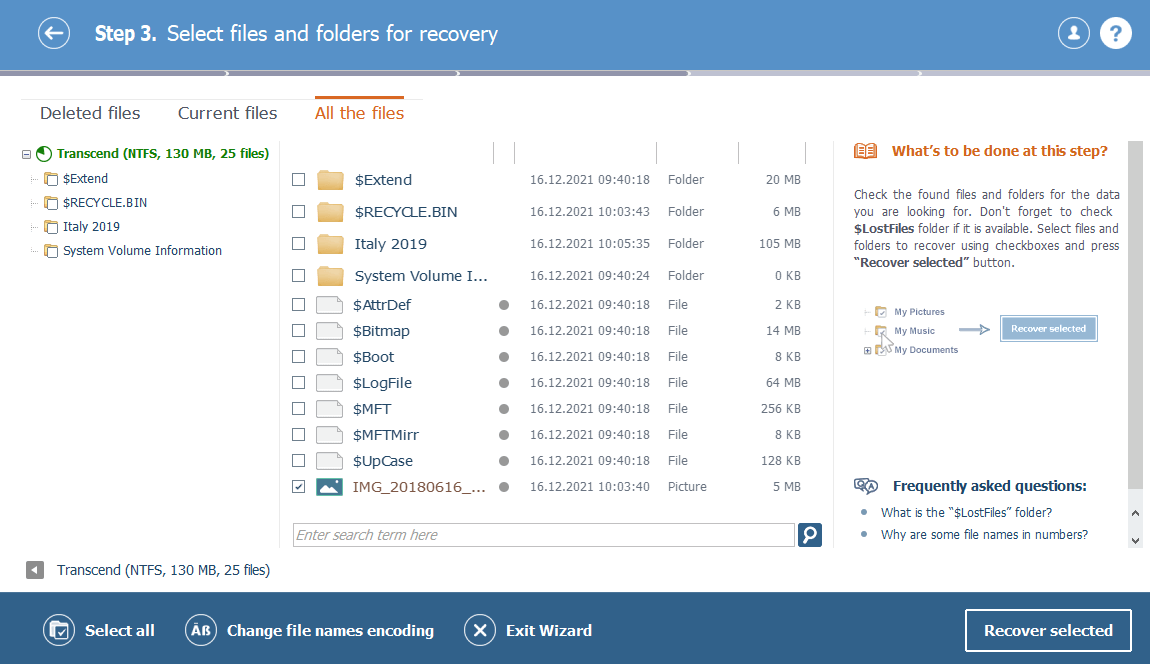
Now check off the file(s) you’d like to save.
-
Then make a click on Recover selected, choose a target data storage different from the drive you’ve just scanned and press Start recovery. The program will copy your files to the selected location.
Now, when you’ve recovered your data, you can eject your external hard drive. Please remove it safely.