Search, select and save restored files in Recovery Explorer
Recovery Explorer Standard is a user-friendly software that doesn’t require advanced technical skills. However, when using it for the first time, you might still need some guidance on how to find a specific file in the scanning results or select and save several files at once. So, if you need detailed instructions, here they are.
File viewer
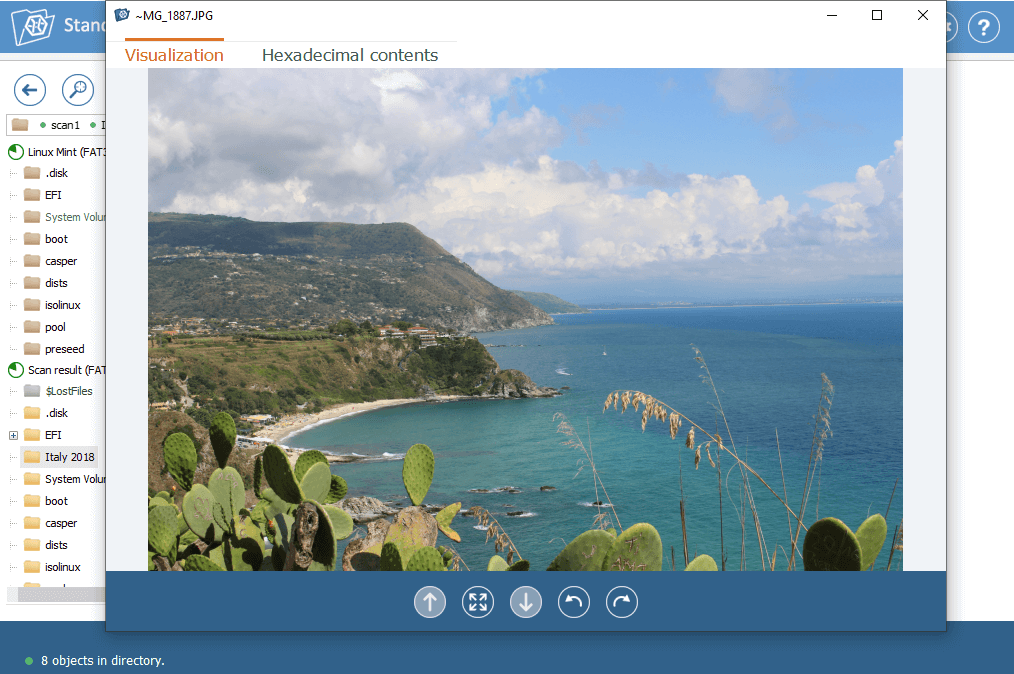
An integrated file viewer is one of the most useful instruments of Recovery Explorer. You can use it to preview images, text documents and PDF files. The list of supported file formats keeps growing with new releases of the program. The preview option is especially handy when you face a long list of similarly-named files and have a limited amount of storage space on the target drive you’d like to save them to. It’s present in both the Standard and the Wizard mode.
Standard mode:
Make a click on a file of a supported type and then on the View option under its thumbnail.
Wizard mode:
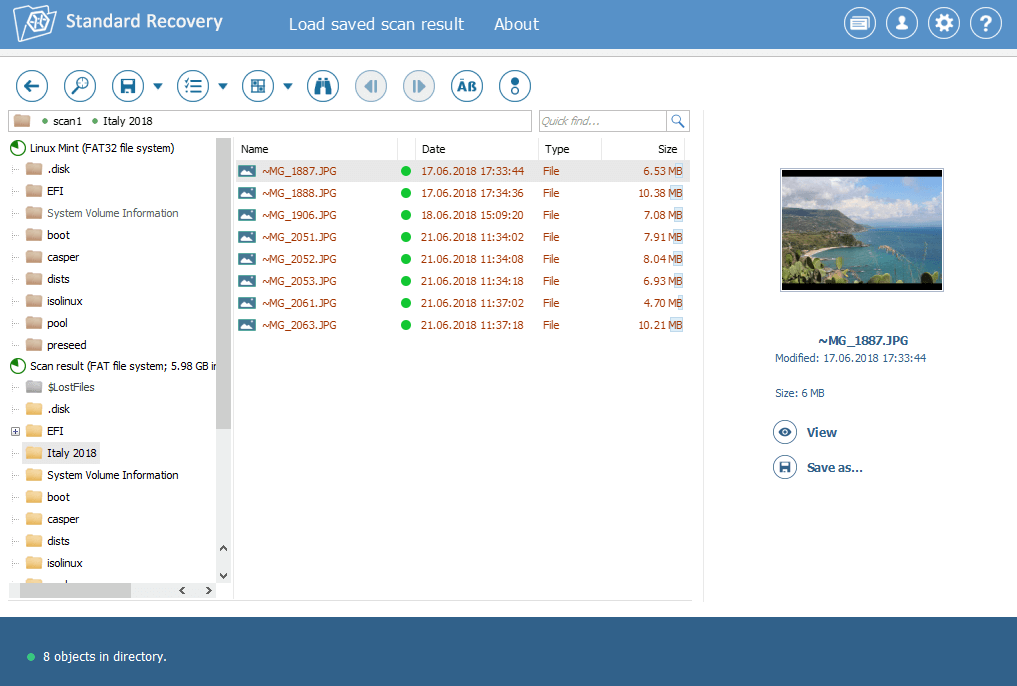
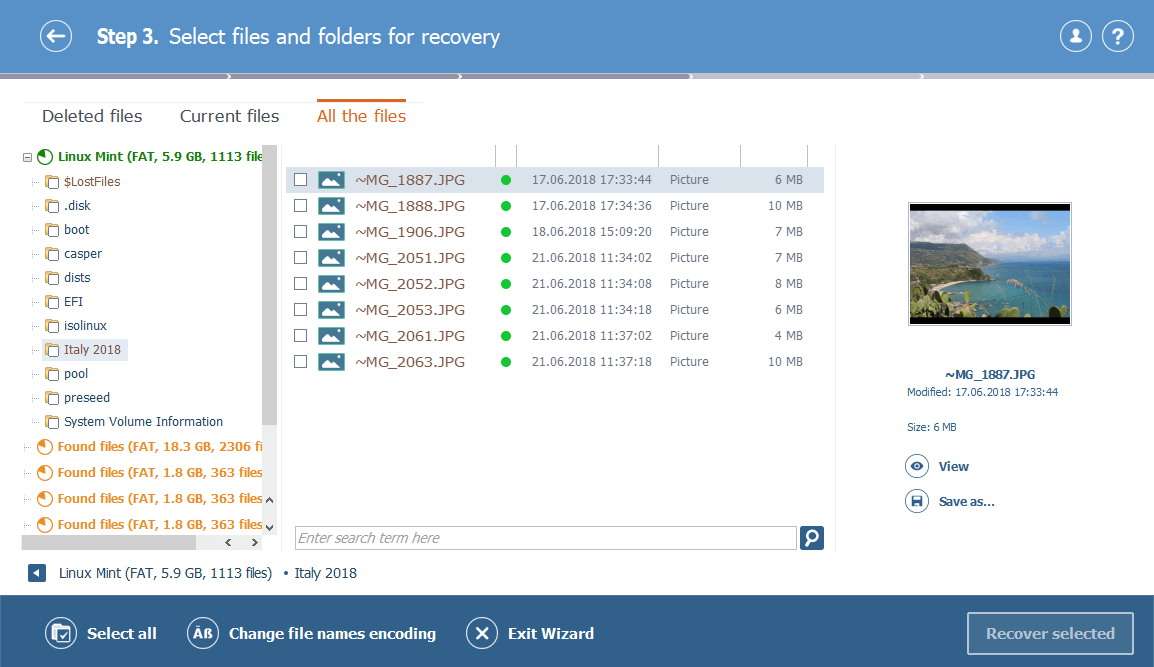
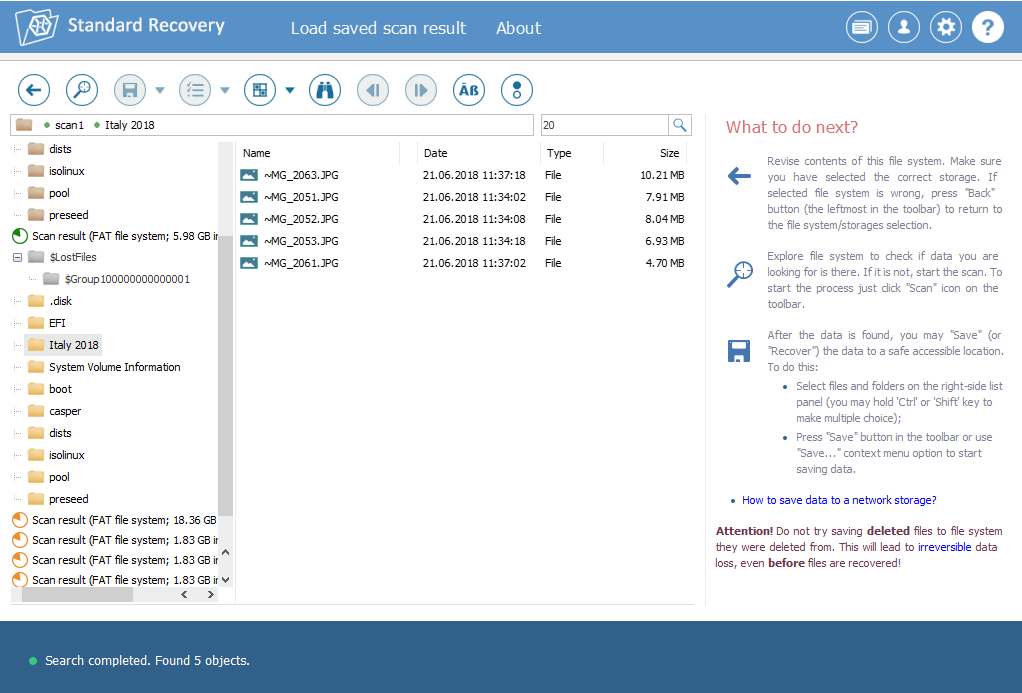
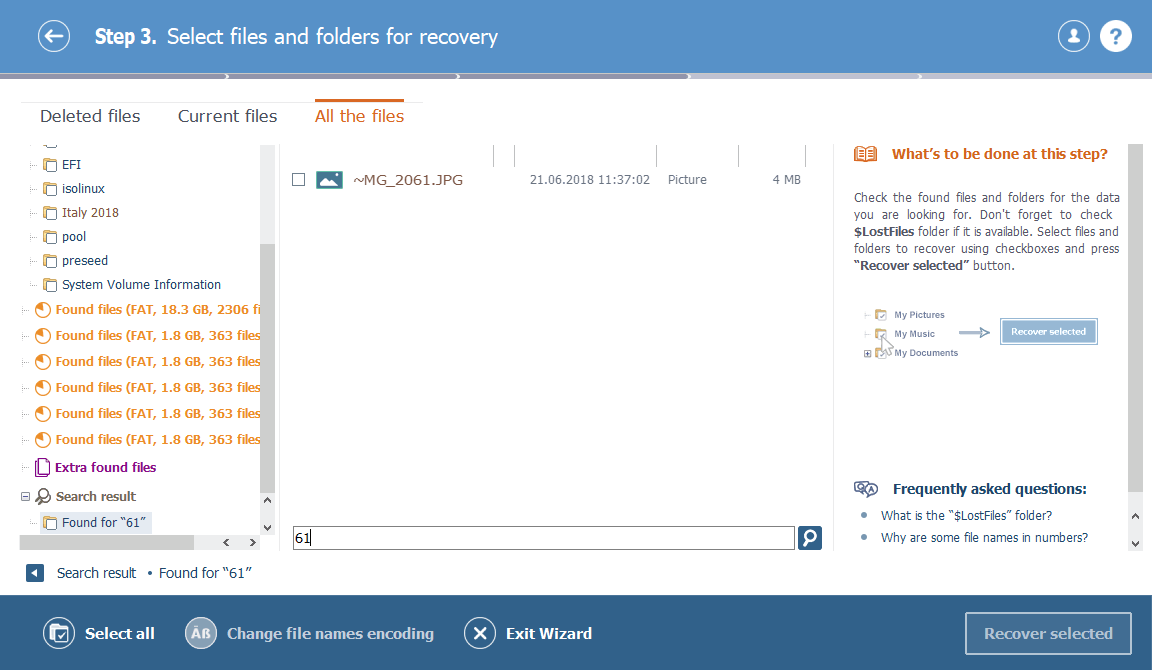
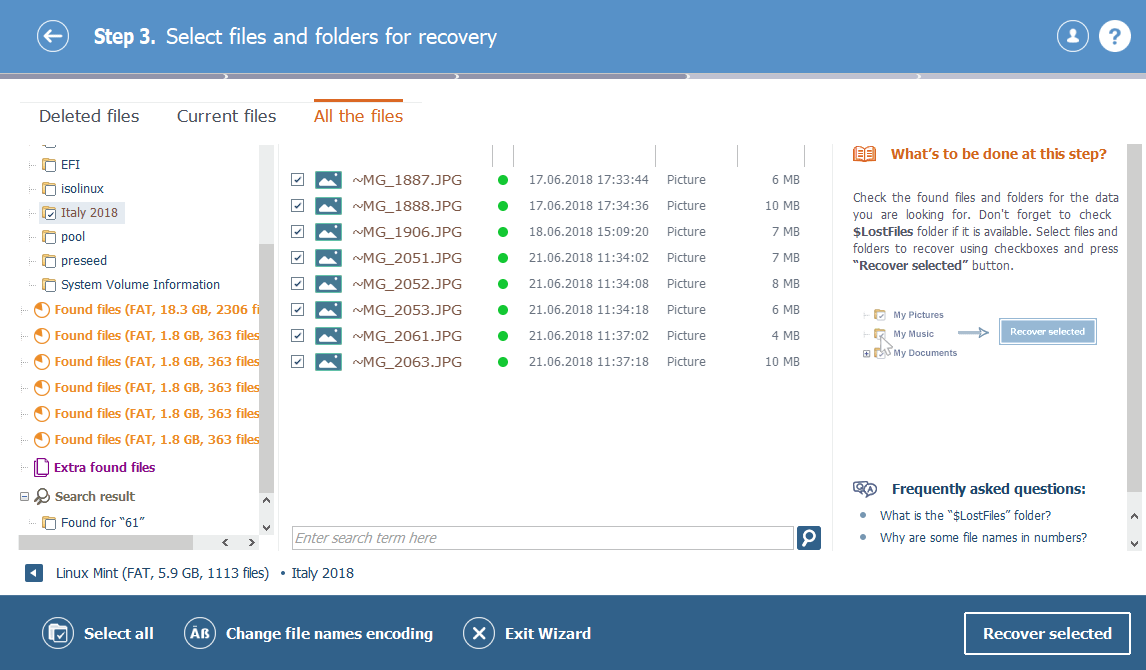
When the scanning ends, there will be three tabs. They let you see All the files at once or only the deleted data found by the program (Deleted files with names in a different color), or look through the files that are currently available on your device (Current files).
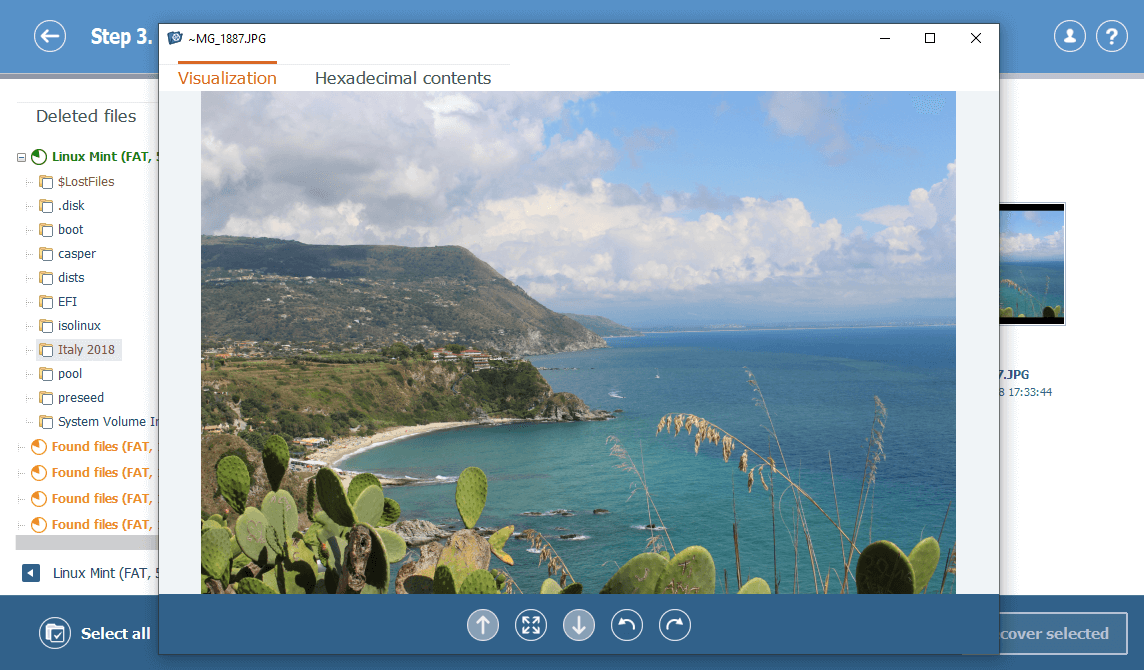
To preview a file in a separate window, just click on its name in the list and then on View:
Search options
Recovery Explorer finds and shows you all the data that could be recovered. If you can’t locate a specific file in the list of scanning results, that doesn’t necessarily mean it’s not there. Probably it has lost its name in the process of deletion or disk formatting, or it has been moved to another folder. In any case, you’d better check the contents of the folder $LostFiles and then use the Search option to find the file you need.
Standard mode:
You can find files in two ways:
-
Open a folder and type the lost file’s name (or at least a part of it) in the Quick find field right above the list. Then click on the magnifying glass icon or press Enter on your keyboard.
-
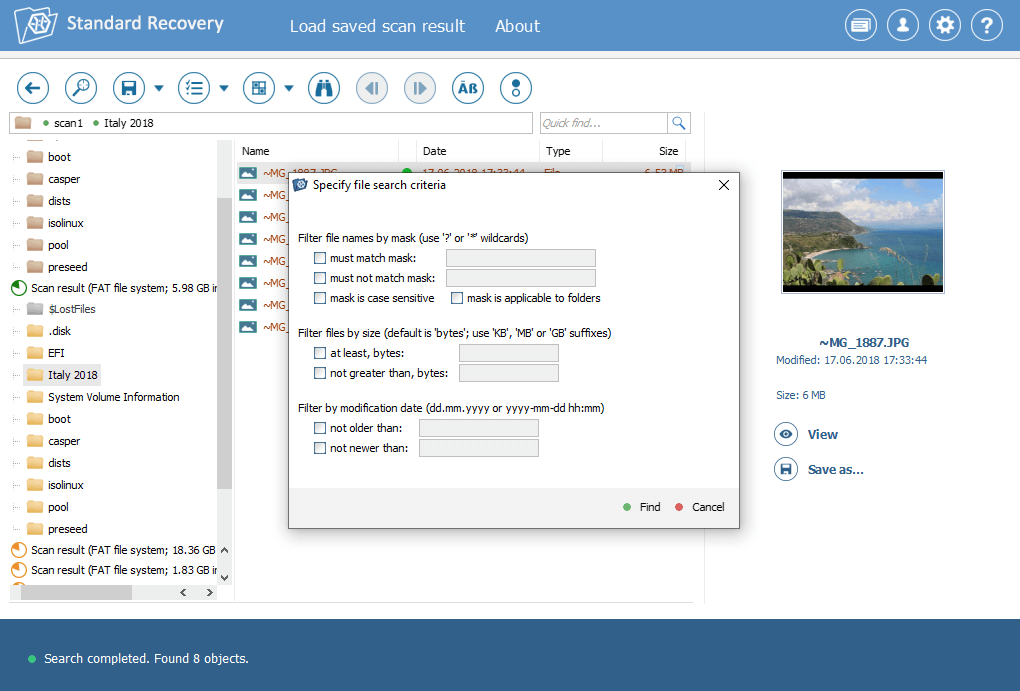
As an alternative, you can click on the Search for files and folders option at the top bar (the binoculars icon) and set some search criteria. You can filter files by a mask, size and modification date.
Wizard mode:
Open a folder, type a search term in the corresponding field under the list of files and click on the magnifying glass icon or press the Enter key.
Selecting and saving files
Most probably you won’t need to save all the files that have been found by the program. In order to save a specific one, first, select it by clicking on it.
Standard mode:
To select several files, hold the Ctrl key and click on file names in the list.
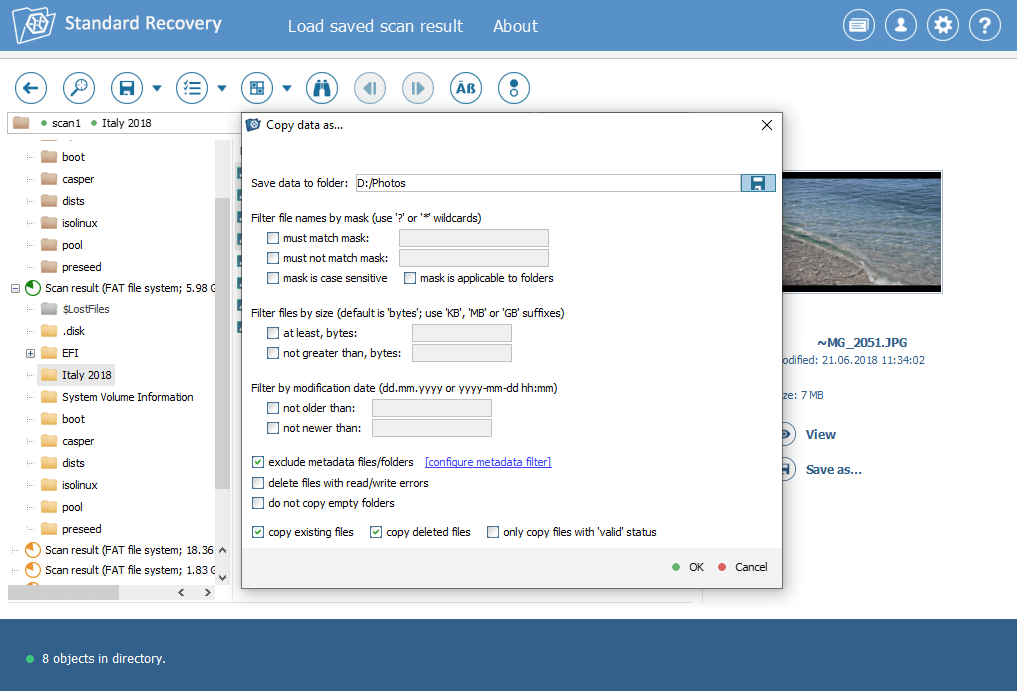
Then click on the floppy disk icon at the top bar, select Save (recover) selection and specify a storage you’d like to copy the restored files to.
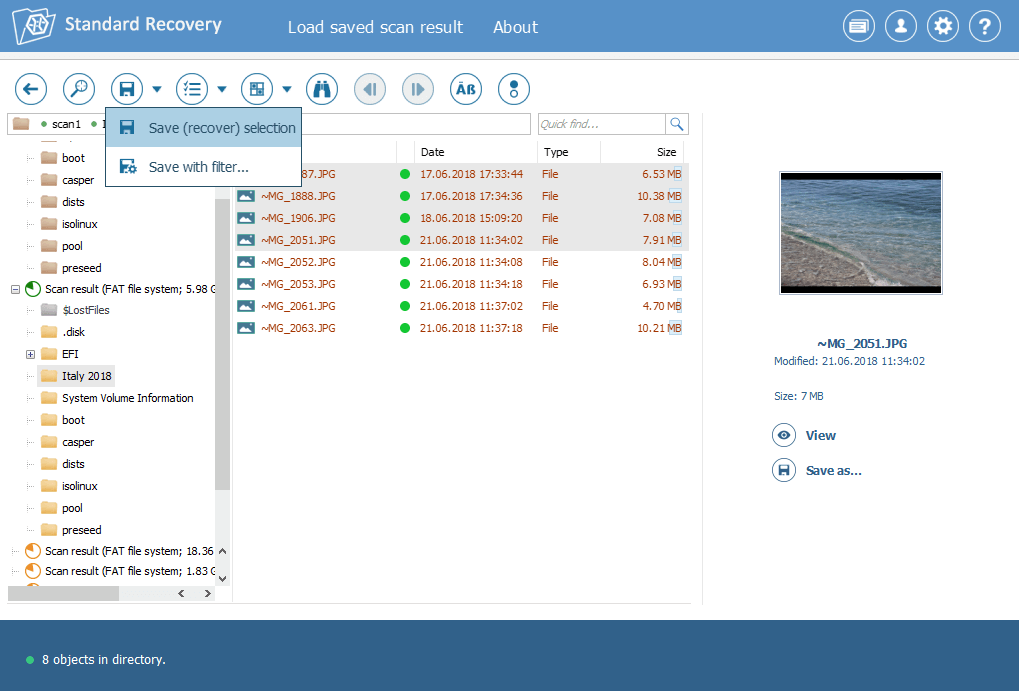
Or you may click on Save with filter… and specify a number of saving criteria: file mask, size, modification date and status (existing, deleted, valid, etc.).
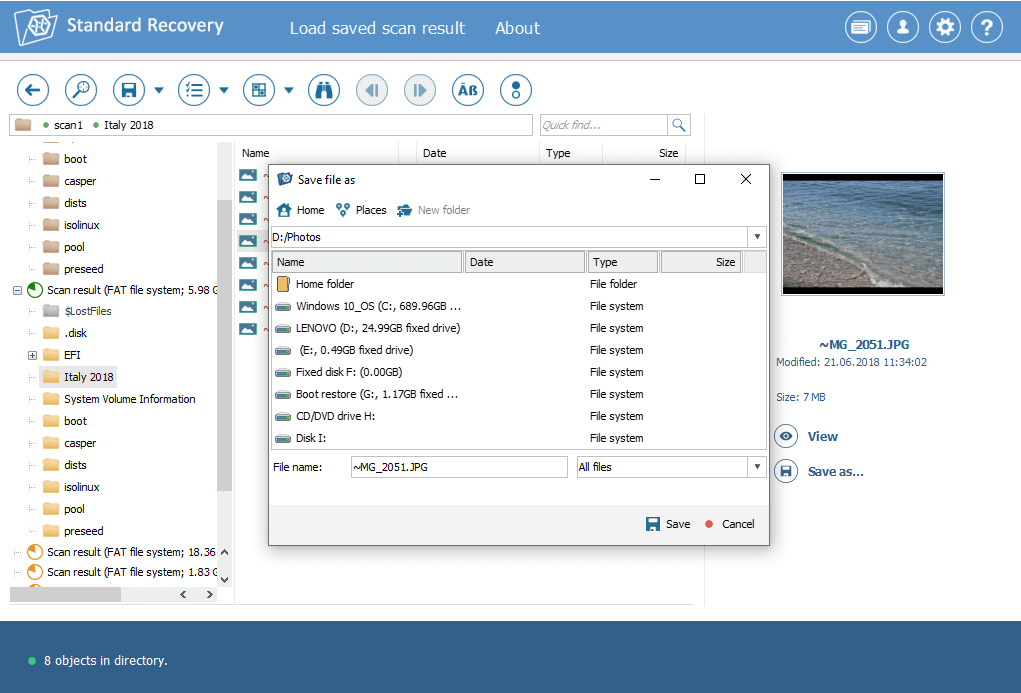
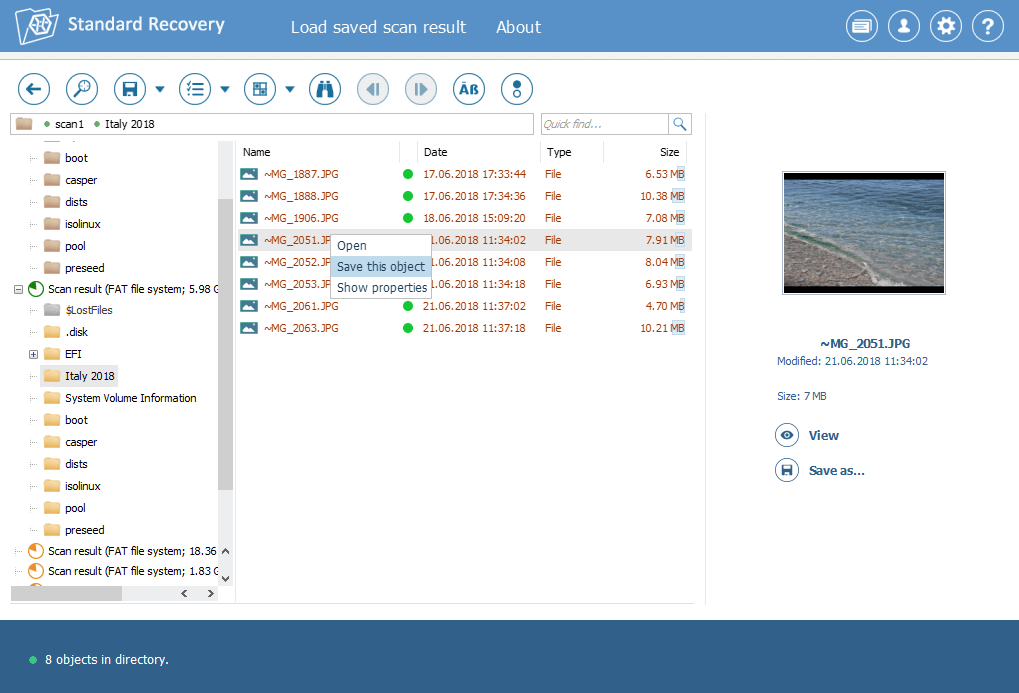
Alternatively, you can save files one by one. Click on the Save as… option right under the thumbnail or use the contextual menu: select a file, right click on it and choose Save this object.
Wizard mode:
Tick off the files you’d like to save.
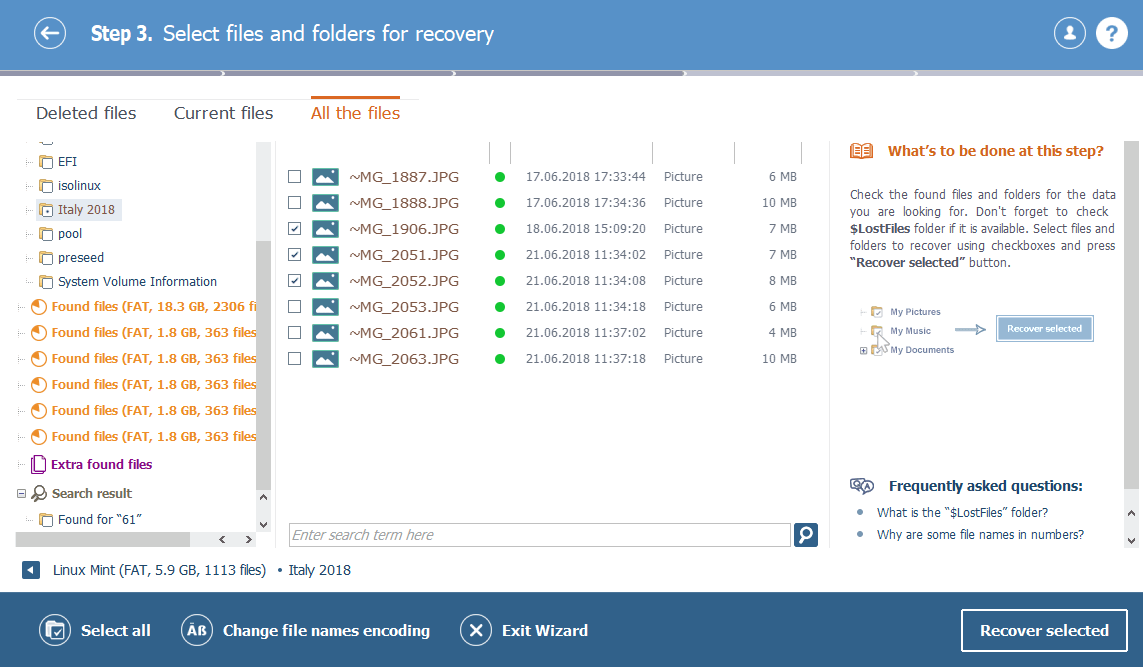
If you need to save all the contents of some folder, select it in the directory tree on the left or open that folder and click Select all at the bottom. Then press the Recover selected button.
On the other hand, you can also select a file and then click on Save as… under its thumbnail.
Now choose a place to save your files to and wait till they are copied there.